Steps to Follow
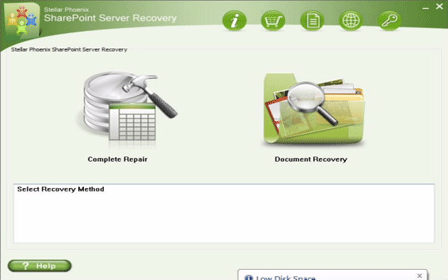
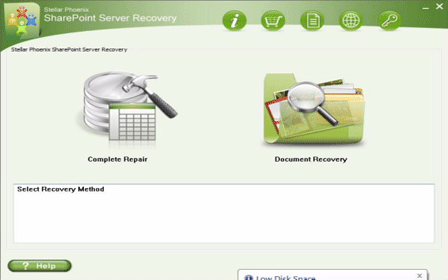
Step 1: Firstly launch the SharePoint Recovery Tool you would find an interface. This interface screen displays two options to recover SharePoint data: ‘Complete Repair’ and ‘Document Recovery’ Select as per your requirement.
Step 2: If you choose ‘Complete Repair’, the screen will show the options for selecting and searching SQL Server (.MDF) files. Click on ‘Select File’ to select a SharePoint database for repair. If you do not know the actual path of the database which you want to repair, click on the ‘Search File’ to locate the MDF file in a specific drive. After selecting the desired file initiate the scanning process.
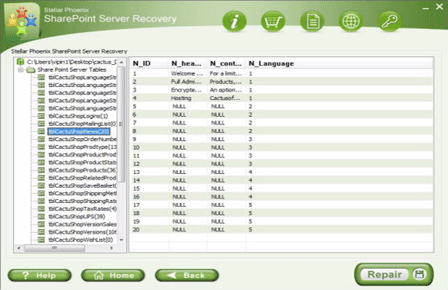
Step 3: After finishing the scan, the software would generate a tree of all SharePoint database tables and will display it in the left pane. You can select the table in the tree and can have the entire preview in the right pane. Then Click on ‘Repair’ to begin repairing for the selected database.
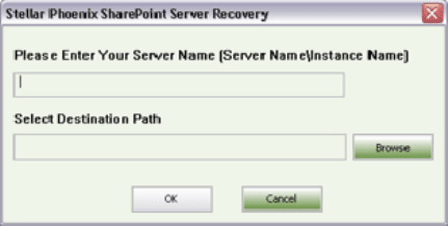
Step 4: After clicking on ‘Repair’, this dialog box will appear. Specify the SQL Server name or Instance name and the desired destination path. Click on the ‘Browse’ option to choose the destination path. And select ‘OK’ button.
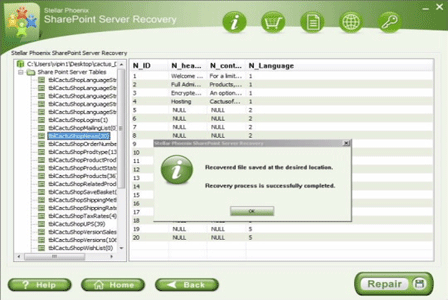
Step 5: Once this process gets completed, you would find a dialog box that displays this message ‘Recovered file saved at the desired location. This shows that Recovery Process has successfully completed’. And select ‘OK’ button.
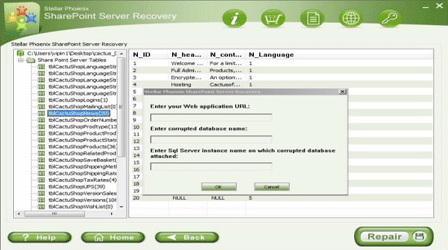
Step 6: You would find another dialog box that asks whether you want to attach the repaired database to the web application. If you click on ‘Yes’ button, the above dialog box will be displayed. In the web application URL type, the name of the corrupt database and SQL Server Instance name. Then Select ‘OK’ button and proceed. When the process gets finished, you would be able to access the repaired database by opening the web application.